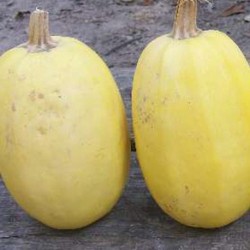

Summer squash sunburst is an F1 hybrid variety. The vigorous plants produce plenty of yellow skinned, scallop edged fruits. Excellent for baby fruit and standard size production.
Just as easy to germinate as courgette seeds and growing squash in your home garden is easy. A few seeds and the right growing conditions can provide you with fresh squash from early spring until the first frost of fall. If you plant winter squash in your home garden, you’ll be able to enjoy the flavor of fresh squash all winter with a couple of simple storage tricks. Use these tips to help you grow enough squash from seeds to keep your family and your neighbors well-supplied with this versatile vegetable.
Planting Location
Squash does best when it is grown in a location that provides the plants with shade from the hot afternoon sun. Select a planting location that is on the east side of taller garden plants, like corn or tomatoes, so the plants will have a reprieve from the scorching afternoon sun.
A location that exposes the squash plants to full morning sun up until 12-1pm each day, followed by afternoon shade or dappled sunlight is an ideal planting location. Plants will become stressed and stop producing if exposed to full sun in the afternoon, so if you can’t provide afternoon shade naturally, use a shade cloth (or something similar) to provide the needed shade.
Prepare Soil
After all danger of frost has passed in the early spring, prepare garden soil by tilling it to the depth of 12 inches. Add a 2 inch layer of compost then lightly till it in to prevent soil compaction and feed the growing plants.
After the soil is tilled and ready, create soil mounds that are 2 feet wide and 6 inches high. Space the mounds 3 feet apart to allow for plant growth and easy harvesting.
Planting Seeds
Squash are warm-season vegetables, but they hate hot weather and will tolerate a little cold snap. Plant squash seeds in early spring as soon as ground is workable and no frost is predicted. If a late frost occurs, cover squash plants with newspaper, cloches or lightweight fabric overnight to keep frost off of them. Remove covering as soon as sun is up the following day.
Use finger to make 2 holes in the top of each soil mound. Each hole should be 1 inch deep and spaced 6 inches apart. In each hole place one squash seed, don’t firm soil down over your seeds, as this will prevent seedlings poking through the compost easily.
Water the squash seeds in well and add a 2 inch layer of organic mulch on top of planting mound, keeping it away from being directly over where the squash seeds were planted. The mulch will help retain soil moisture, prevent weed growth and keep developing squash from coming into contact with soil.
Plant summer squash seeds at 2 week intervals for 6 weeks so you will have a steady supply of fresh yellow or zucchini squash to enjoy all summer. Winter squash varieties can be planted all at the same time.
Pest Control
Squash have one main enemy, the squash borer, and you’ll have to be diligent to protect your plant or the borer will wipe out your entire squash crop. The adult squash borer is a black and yellow flying moth which is often mistaken for a bee in the garden and allowed to fly about undisturbed. This bee-impersonator is busy laying her eggs at the base of your squash plants, and when those eggs hatch the larvae will eat their way into the squash plant’s stem and destroy the plant from the inside out.
The best way to prevent this from happening is to kill the adult before she has a chance to lay her eggs. Inspect plant daily, paying careful attention to the stem base. Remove any visible eggs by hand and destroy them, also kill any adult squash borer you may see flying around your garden.
The base of the stem can be wrapped in aluminum foil from ground level to 3 inches up the stalk for added protection.
If the squash borer eludes you and manages to lay eggs in your vines, split the stalk at the entry point, remove the eggs, then bury the split stalk with garden soil. If all the eggs have been removed and minimal damage done to the plant, the newly buried stalk will form new roots and continue to grow and produce squash.
Food and Water
A side dressing of compost 4 weeks into the growing season will help keep the plants producing abundantly. Keep soil moist at all times so the plants won’t become stressed.
Harvest Time
Harvest yellow or zucchini squash at any stage of development by cutting the stem end loose from the vine. Frequent harvesting promotes more vegetable production.
Winter squash won’t be ready to harvest until late summer and is ready when you can't poke your fingernail into the rind. Use a sharp knife to cut squash from vine, wipe rind with a damp cloth and place in a warm location for 2 weeks so it will cure. After the 2 week curing time, store winter squash in a cool, dry location.