
In this Article
- 1 What is a tomato grow bag?
- 2 Advantages of growing tomatoes in growbags:
- 3 Disadvantages of growing tomatoes in growbags:
- 4 Step-by-step guide to growing tomatoes in growbags
- 5 How do you use tomato halos in a grow bag?
- 6 How to water tomato plants in a grow bag
- 7 Do tomatoes in growbags need to be fertilised?
- 8 What can I do with the leftover soil from growing tomatoes in growbags?
- 9 How to make tomato grow bags
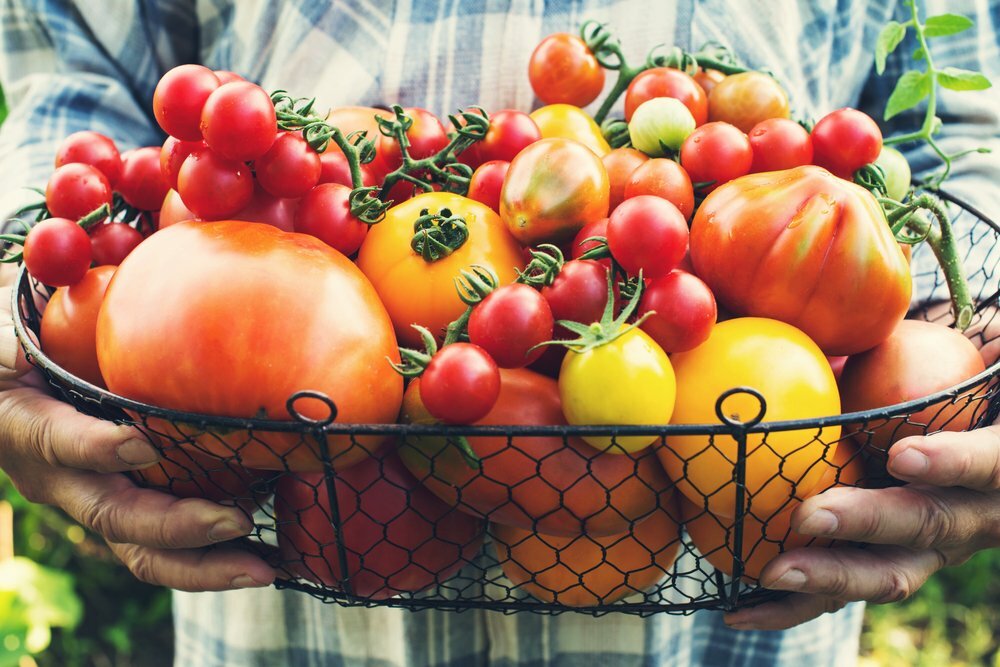
Growbags are a great way to cultivate a delicious crop of tomatoes even from seeds, particularly if you’ve got limited space for growing vegetable crops. A growbag is a fast and easy way to create a temporary growing area for the summer season, providing the ideal conditions for these fast-growing plants to thrive. We’ve got some great tips to help you get the best possible results from tomatoes grown in growbags – keep reading to find out more!
What is a tomato grow bag?
We need to clear up a potential area of confusion right from the start, as the word ‘growbag’ means more than one thing in the horticultural world! As the name suggests, we’re talking about a bag used to grow plants in – normally vegetable crops. This is a simple and fast way to create the ideal growing space for plants to thrive and is a great solution if you’ve got limited space or are unable to make permanent garden beds.
Prefilled tomato grow bags
In the UK, the term growbag is commonly associated with robust plastic sacks that are prefilled with good-quality compost. These sacks are laid directly onto the ground and holes are cut into the plastic to create planting zones. Prefilled growbags are only used for one growing season so must be purchased new every year, but the spent compost is useful for other gardening projects.
Reusable tomato grow bags
Hop over to the US, and you’ll find a whole different type of grow bag – reusable sacks made from plastic, jute, or fabric that need to be filled with compost to create an instant pop-up growing space. These are normally robust enough to be reused year after year, but the compost will need to be replenished at the start of every growing season.
Hanging tomato grow bags
Another type of reusable grow bag you might come across are hanging tomato bags – plastic sacks or containers with pre-cut holes through which young tomato seedlings can be planted. These can then be hung in a suitable location, creating vertical growing areas to maximize space in smaller gardens.
Today we’re going to take an in-depth look at how to grow tomatoes in prefilled growbags – the type commonly found in most UK garden centres and DIY stores. If you’re interested in using reusable grow sacks like the ones described above, follow our guide to growing tomatoes in pots to guarantee great results.
Advantages of growing tomatoes in growbags:
- Perfect soil conditions for healthy growth and optimum yields
- Creates an instant growing area in any location
- Can be used in any suitable sunny area, even patios and paved backyards
- Good short-term substitute for permanent garden beds
Disadvantages of growing tomatoes in growbags:
- More expensive than growing tomatoes directly in the ground
- May need watering more frequently
- Soil can become compacted
- Can be difficult to provide adequate plant supports
Best type of growbags for tomatoes
When selecting a pre-filled tomato growbag, look for ones filled with organic compost from sustainable sources. The use of peat in compost is being phased out in the UK for environmental reasons, as harvesting peat is a major contributing factor to climate change. However, this has left home growers struggling to find alternatives that live up to their promise!
Peat-free growbags normally contain a mix of wood fibre, composted bark, coconut coir, and composted municipal green waste. Drainage is improved with the addition of vermiculite, perlite, or horticultural grit, and well-rotted animal manure helps to boost nutrient levels. Some manufacturers are getting great results with innovative materials such as composted bracken and sheep’s wool, and we’ll likely see a huge improvement in the quality of peat-free garden compost over the next few years.
Do tomatoes grow better in growbags?
Many gardeners opt for ready-made growbags as they are convenient and easy to use, but are there any benefits to your crop?
Prefilled growbags provide the optimum growing conditions to produce an impressive yield of delicious homegrown tomatoes without the hassle of preparing a designated growing space. As with all tomato plants, they must be watered regularly and get plenty of warmth and sunshine for optimum growth and fruit production.
However, if purchasing growbags is not within the scope of your budget, it is perfectly possible to get a bumper crop from tomatoes sown in containers or directly in the ground. You may need to be slightly more diligent with watering and fertilising, but the results can be just as good.
Step-by-step guide to growing tomatoes in growbags
Prefilled tomato growbags are easy to use, but following these super-simple tips will help you get the best possible results time after time.
Step 1: Prepare the growbags
The compost in growbags will be highly compacted, so give them a good shake around to loosen the contents. Prefilled growbags can be quite heavy, so this might be a two-person job! The aim is to break up any larger lumps and allow the compost to move freely around inside the bag.
Next, pick the perfect location for your growbags. They can be laid on pretty much any outdoor surface – soil, grass, concrete, or even gravel. Remember that tomatoes love heat and dislike chilly winds, so a sunny, sheltered spot is ideal. A south-facing wall or fence is a good option as heat will be retained through the day and increase ambient overnight temperatures. Prefilled growbags are intended to be laid horizontally on the ground, creating a large flat surface into which seedlings can be planted. You’ll see people suggesting many other weird and wonderful ways of using them, such as standing them upright, but sticking to the original method gives the best results.
Finally, cut out the planting holes on the upper surface of the growbags. These are normally pre-marked by the manufacturer, but there is no harm in adjusting them to suit your planting requirements. For example, some smaller bush tomatoes will tolerate being planted closer together, so you may wish to cut three holes instead of two. After cutting the planting holes, use a hand fork to gently loosen the compost ready for planting.
One thing to double-check is the manufacturer’s recommendations regarding drainage holes. Some prefilled growbags already have small drainage holes on the base, in which case your work is done. Others may need small slits cutting along the sides of the bag, an inch or two above floor level, to allow excess water to drain away.

Step 2: Plant the tomatoes
An hour before planting, soak young potted tomato plants in a tray of water to hydrate the soil and prevent damage to the root system. Using a hand trowel, gently make a hole in the growbag compost slightly larger and deeper than the rootball, and place the plant in the compost. Firm the roots by pressing down gently on the compost and water in well.
This is a great time to add in some companion plants alongside your tomato plants – marigolds and nasturtiums grow well in growbags and will help to keep pests at bay.
Step 3: Place supports
One of the trickier aspects of growing tomatoes in growbags is providing adequate support. If the bags are placed directly on soil or grass, stakes can be pushed through the base of the bag into the ground below. Other options are attaching a trellis to a fence or wall behind your growbags, or placing tomato cages directly over the growbags.
How do you use tomato halos in a grow bag?
Although it is possible to grow a perfectly good crop of tomatoes in a standard prefilled grow bag, plant halos help to get around many of the problems associated with this growing method.
A plant halo is a circular bottomless container that can be pushed directly into the soil. This is then filled with compost, raising the height and the available root space for your plants. Around the outside of the planting zone is a separate chamber with small holes at the bottom, which can be used as a slow-release water reservoir. Most plant halos also have purpose-made slots for plant supports, helping to keep your tomato plants protected from damage.
Tomato plant halos can be reused every year, and the initial financial outlay may be repaid in increased crop yields after a few years. However, many gardeners get great results without them, so if your budget is limited they are not an essential outlay.
How to water tomato plants in a grow bag
Getting the water levels just right is one of the trickiest aspects of growing tomatoes in growbags. A common issue is that water runs off around the sides of the bag and out through the drainage holes, failing to adequately moisten the compost. Luckily, there are some quick and easy ways to ensure your thirsty tomato plants get plenty of water:
- Make sure the compost is evenly spread across the full area of the growbag, with no gaps at the sides.
- Leave a slight dip around the stem of each tomato plant to prevent water from draining away too quickly.
- Sink a small plant pot into the soil next to each tomato plant to act as a water reservoir.
- Install a simple drip irrigation system to keep your plants well hydrated and also reduce water usage.
Do tomatoes in growbags need to be fertilised?
The compost in prefilled growbags is normally very rich in nutrients and perfect for growing tomatoes. Some also contain slow-release fertilisers that will provide nutrients throughout the growing season – if this is the case, then no additional fertiliser is required. If in doubt, check the labelling on your growbag to determine the manufacturer’s recommendations.
Tomato plants are notoriously hungry feeders, and slow growth or yellowing of the leaves may indicate low levels of nutrients in the soil. If this is the case, fertilise your growbag tomatoes every two weeks with organic tomato fertiliser or compost tea. Many gardeners swear by adding banana peels to water as a natural source of potassium for tomato plants.
What can I do with the leftover soil from growing tomatoes in growbags?
Prefilled growbags are a useful and convenient way to grow tomatoes, but what do you do with them at the end of the sowing season? At this point, the nutrient levels in the compost will be depleted, so it should not be used to grow tomatoes the following year. However, this compost is still rich in organic matter and is a great soil conditioner for garden beds and herb planters.
How to make tomato grow bags
If buying prefilled grow bags year after year feels like an unnecessary expense, making your own is a quick and easy money-saving DIY project. All you need are some sacks, tape, and a source of good-quality compost, and you’ve got everything you need to create the perfect growing space for tomatoes. And if you’ve got a productive compost heap up and running, the financial outlay is almost zero!
Leftover compost sacks are easy to upcycle into tomato growbags, but any sturdy plastic sack will do the job. Burlap and hessian sacks can also work well but will need more frequent watering to prevent the soil from drying out.
Start by filling the sack about two-thirds full with good-quality compost, taking care to break up any lumps. This task is much easier if the compost is fairly dry, as wet compost can be very heavy!
Next, carefully fold over the open end of the sack and secure it with tape. Be generous with the tape, as the last thing you want is the sack bursting open. It is a good idea to prepare your DIY growbags near their final location to avoid having to manoeuvre them around too much.
Gently lay your homemade growbag horizontally on the ground, and carefully shuffle it around to evenly distribute the compost. Cut planting holes in the top and drainage slits on the side and voila – you’ve got a DIY tomato growbag for a fraction of the price!