
I’m going into plot or ground grown Potatoes and Helen has done a separate one here about growing in containers.
Home grown spuds always taste better than bought ones and you have a far greater variety that you can choose to grow. You can grow potatoes in most soils but prefer a slightly acidic soil. They are greedy feeders so you need to work a good amount of manure or compost into the trench when preparing. They should not be planted after or before Strawberries or Tomatoes as they may cause viruses to each other.
Growing
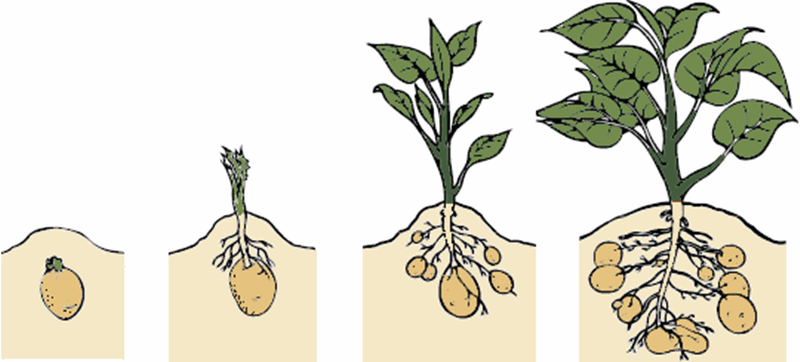
Potatoes are best grown from specially grown tubers and it’s not advisable to grow from supermarket bought as they normally have an inhibiter applied to stop them sending out their “chits” (growing shoots). Also don’t keep your own smaller spuds to grow due to diseases etc.
Potatoes are classed into three types: 1st Early, 2nd Early and Main Crop. These names really only refer to the time from sowing to harvesting.
1st Early are ready in around 10 weeks.
2nd Early about 13 weeks.
Main Crop after 20 weeks or so.
Chitting in seed trays and egg boxes
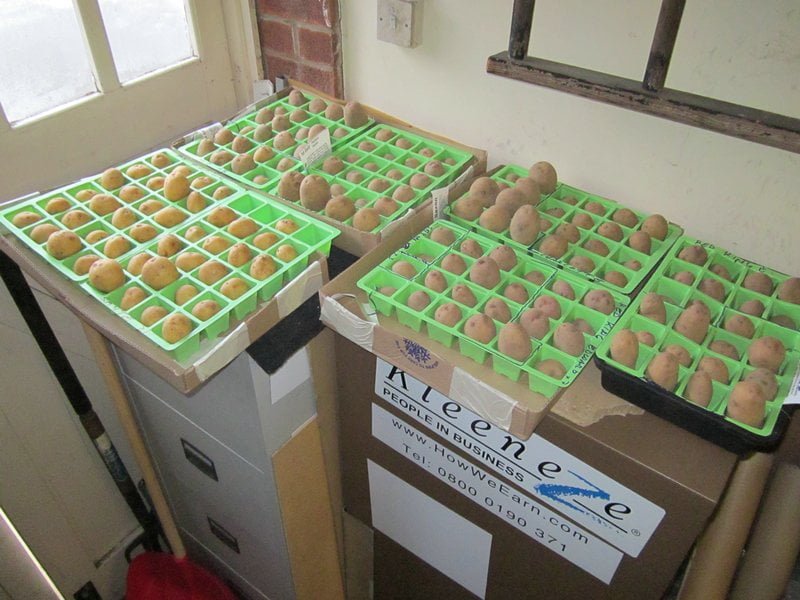
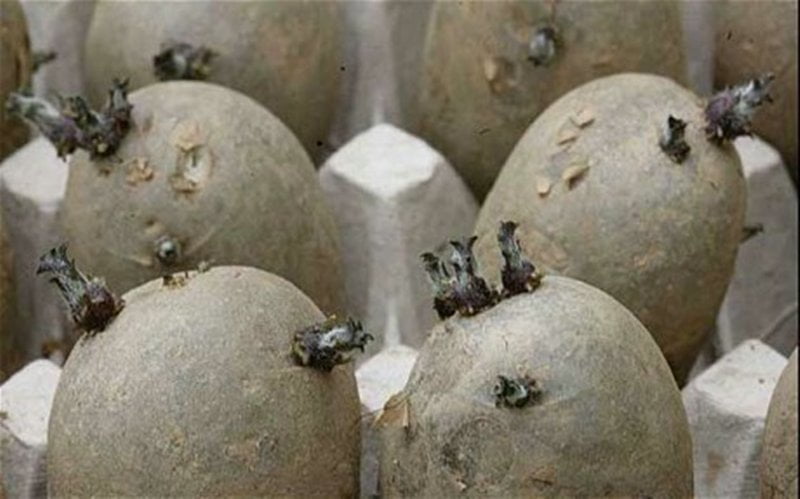
The seed tubers need “chitting” before planting but if you don’t have time to do this don’t worry – they will still grow but take a couple of weeks more to mature. Chitting simply means getting them off to a good start by getting some growth sprouts growing.
Start this about 6 weeks before you intend to plant. To do this you need to place them in seed trays or egg boxes or similar in a cool light place by placing the seed potato rose end up (the blunt end with the most shoots or ‘eyes’). After a while they will start shooting new growing shoots. Once these are 1”- 4” long they can be planted out. This process is more important when planting early varieties of potato.
Planting times vary with when the last frosts are expected and need to be planted no earlier than about 6 weeks before this. You can start the Earlies in Mid to late March and early April. Main Crop a couple of weeks later.
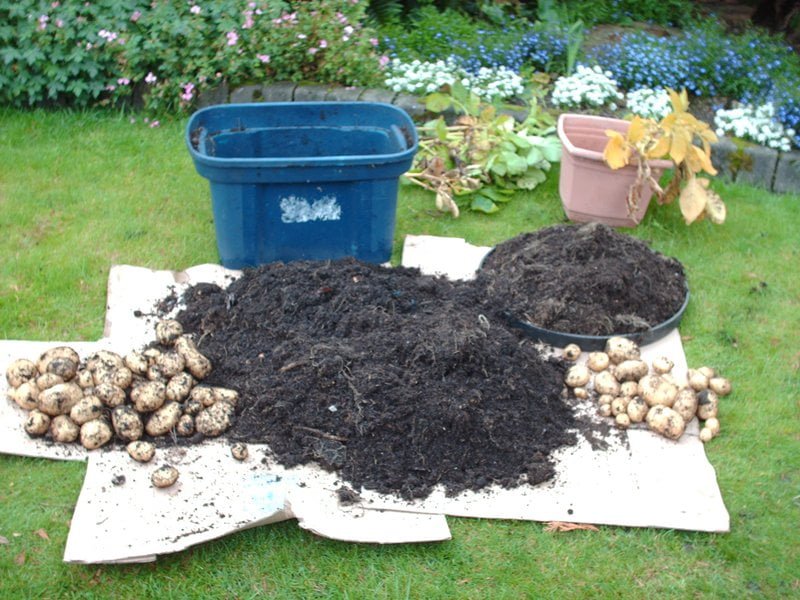
To sow you need to dig a small trench about 9” (23cm) deep. Half fill it with some good compost and manure if you have some. Now place the potatoes with the new growths upwards and as per the spacings below. Then pull the soil in from the sides to cover the potatoes. A layer of Comfrey leaves added to the trench will also give them a good feed, as will some general fertilizer sprinkled in the soil when covering. You can cover them over with about a (10-15cm) 4” – 6” mound of soil above ground level. If the frost threatens when they are showing through you need to cover them with a fleece or similar.
These pics showing trench filled with compost and manure and the rows now covered with 6″ of soil

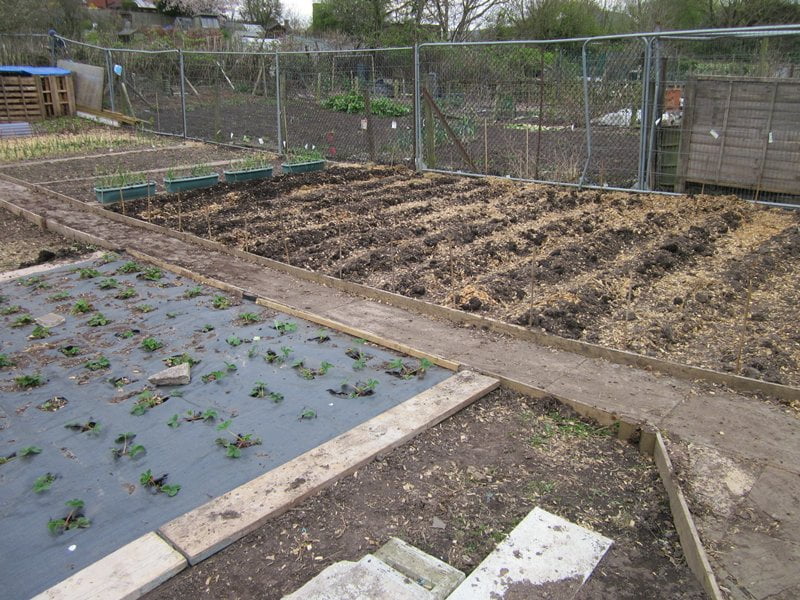
Both Earlies should be planted about 12 inches (30 cm) apart, in rows 20 inches (50 cm) apart. Maincrop potatoes need a bit more space – plant them about 16 inches (40 cm) apart, in rows 26” (70 cm) apart.
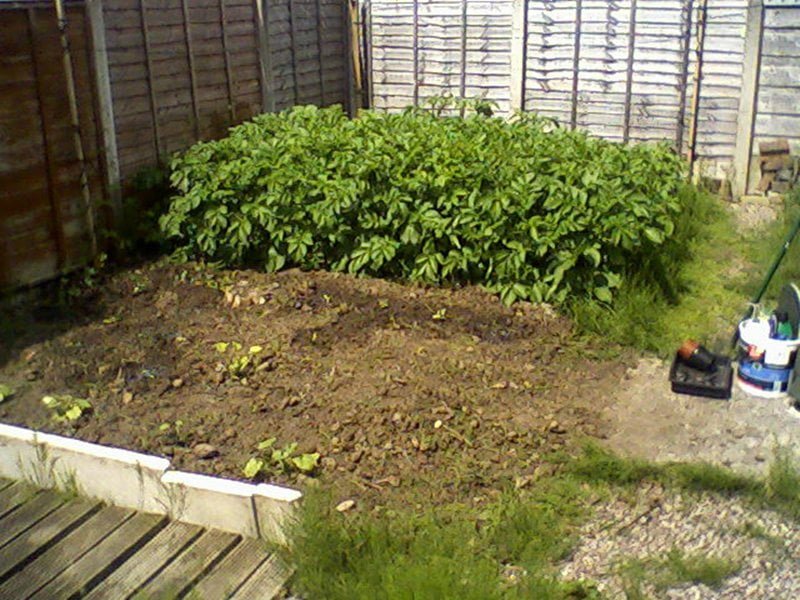
As the plants grow you need to earth them up. When about (15 – 20cm) 6”- 8” of growth (hallum) is showing pull some earth from the sides of the rows over the plants with a hoe or small spade. Do this a couple of times during the growing period. This will keep the weeds down a bit and also stop light getting to the growing tubers or they will turn green and will give you a stomach ache if eaten.
They will need an additional dose of general fertilizer or specifically formulated for potatoes a couple of months or so after planting. BFB (Blood Fish Bone) or liquid Comfrey feed will be good. Keep regular waterings in dry weather as irregular watering will cause uneven growth and growth cracks.
Harvesting
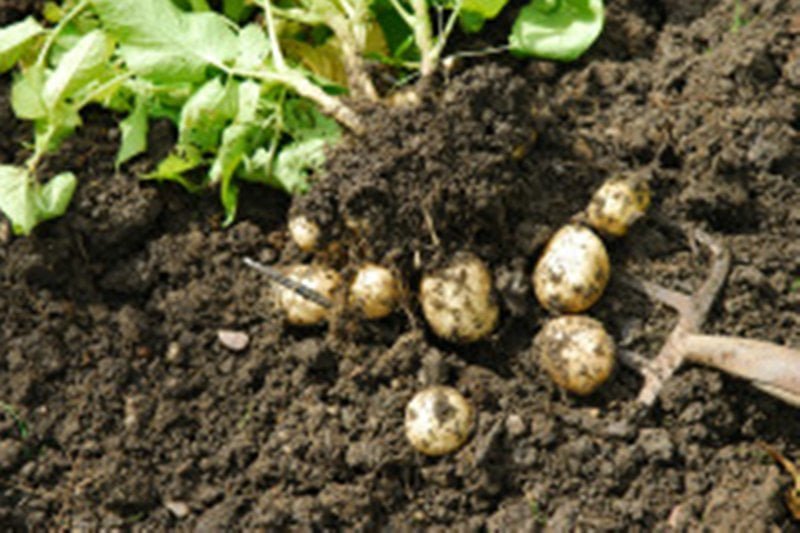
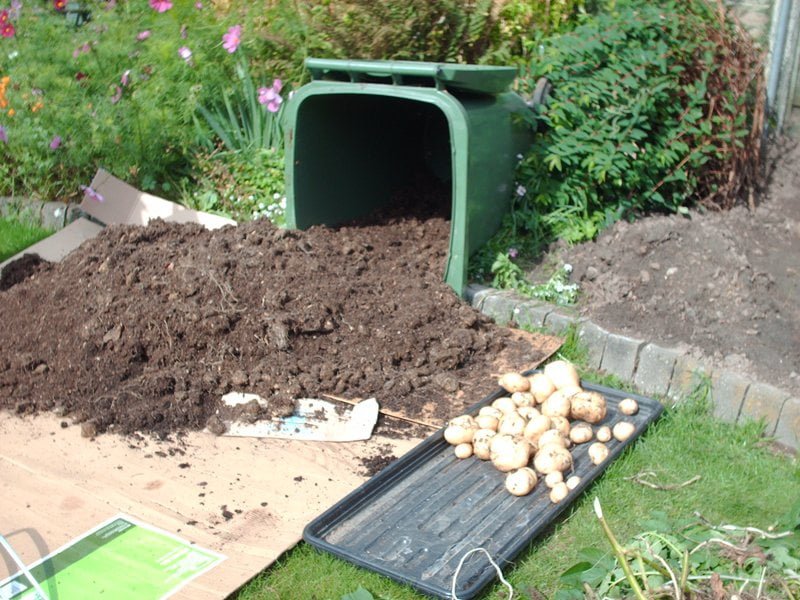
Harvesting your new potatoes is easy. To check if they are ready you can “furtle” around the soil by digging down with your hands and getting some samples. If they are big enough you can dig them out. Take a fork and carefully lift the whole plant out from the side. Dig down more to get them all out. You will spear some but hey it’s all part of growing spuds. Once you have used up all your earlies you can dig your main crop by digging them all and left on the surface for a few hours to harden the skin a bit for better storing. Dig out even the smallest tubers as you don’t want volunteers the next season to stop any virus or disease spreading.
I wash, check for slug holes and damaged tubers and dry my crop once I get them home and then store in hessian sacks. It’s best to store in a dry and dark place. I have mine on the shed floor placed between sacks and carpeting to keep them from freezing. I sort by variety and size and store accordingly. Remember to add a teaspoon full of slug pellets to catch any slugs that are in the potatoes that you may have missed. I use the slug damaged and spiked potatoes first.
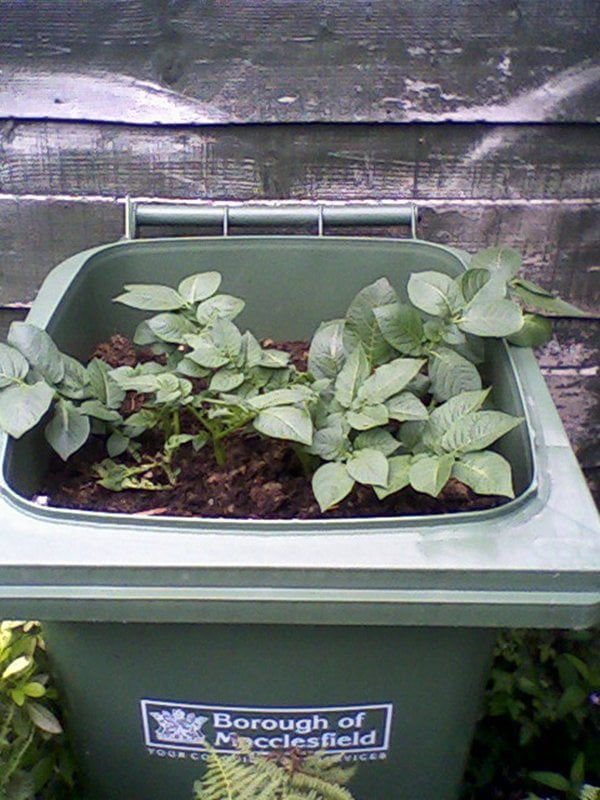
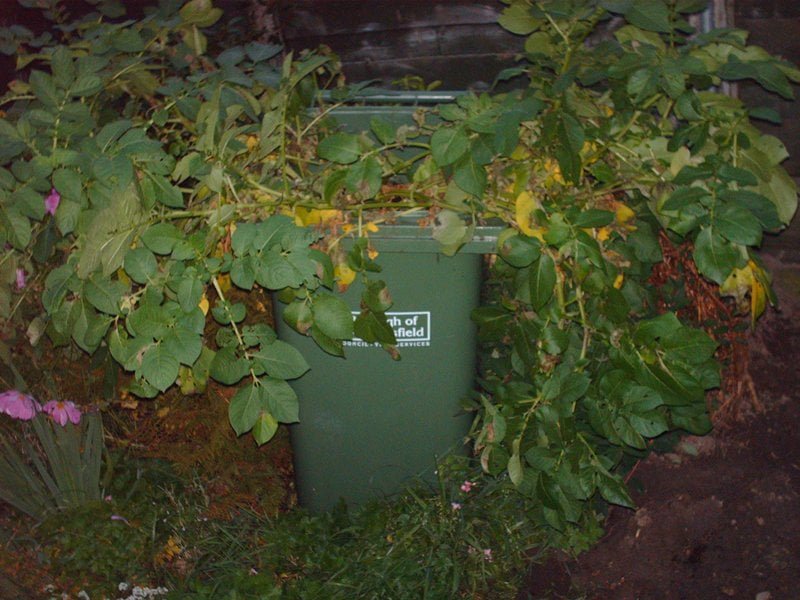
You can also grow in containers and before I got my garden shares and then the allotment I did a few years in containers on my rooftop garden.. I did a wheelie bin full as well but the results were bad as I had not got the watering down through the whole bin.
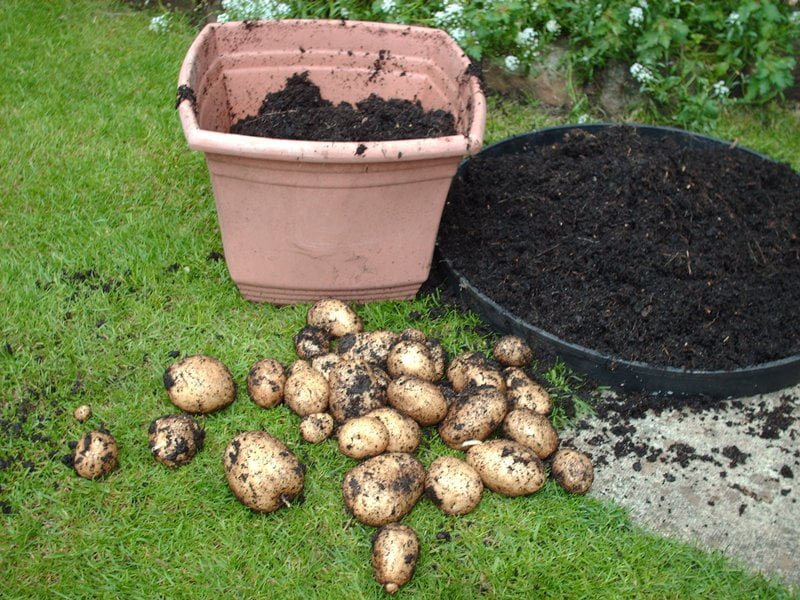
Advice on Container Growing Potatoes here..